Caramel Apple Wedges

Caramel Apple Wedges

Caramel Apple Wedges

These Carmel Apple Wedges are a fun bite sized version of their big sisters. A real crowd pleaser, great for parties or events!

  • Prep Time25 min
  • Ready in2 Hours
  • Serves24 Wedges

    Ingredients

    • 2 Green Apples
    • 1 Bag Kraft Caramel Bits
    • 2 TBS Water
    • Favorite Toppings
    • 1/3 C White Chocolate Chips
    • 1/3 C Milk Or Dark Chocolate Chips
    • Olive oil

    Non Food Items

    • Parchment Paper (optional)

    Method

    1

    Prepare all of your toppings and place them in bowls easy to dip in. Using an apple slicer or knife, cut up the apples. Prepare your parchment paper (if using) on your cookie sheet and set aside.

    2

    In a microwavable bowl, add the bag of Kraft Caramel Bits and water. Microwave for 2 minutes, then stir until the caramel is smooth.

    3

    Dip the apples into the caramel, and with a fork remove apple, letting any excess caramel drip off. I usually do 2-3 apples at a time. NOTE: Since the apples are wet, the caramel likes to slip off. I find that the hotter the caramel is, the better is stays on. Also, if that doesn’t work, try patting the apples dry. Feel free to re-heat the caramel as needed.

    4

    Place the caramelized apple into one of your topping bowls. Using your fingers, cover the apple with the toppings, lightly pressing into the apple to ensure coverage. Set on parchment paper, or a cookie sheet.

    5

    In a microwavable bowl, add the white chocolate and drizzle a few small drops of oil over the top. Microwave and cook for 30 seconds. Give it a stir, then microwave again for 20 seconds. Stir again. If the chocolate is still stiff, cook for another 10 seconds, and continue until smooth. Drizzle chocolate over the apples with a spoon. Repeat with Dark/Milk Chocolate.

    6

    Refrigerate for at least 1.5 hours and leave in the fridge until ready to eat.

    PRO TIP: If the caramel apple wedges aren’t going to be consumed for 2.5 hours or longer, you may want to put cooling racks on your cookie sheets and then put your apples on the racks. Since the apples are sliced, they tend to weep if left too long in the fridge. Setting them on the racks will help the excess liquid drip off without the bottoms becoming soggy.

    caramel apple wedges

    Caramel Apple Wedges

    *HOw to Video*

    Caramel Apple Wedges
    Step 1

    Alright people, let me begin by saying that this recipe tastes as good as it looks! Let’s start making our Caramel Apple Wedges! 

    To set yourself up for success, before you melt the caramel, GET EVERYTHING PREPPED! And I mean everything. 

    Get all your toppings chopped and placed in bowls. Get your cookie sheet out and ready to go. Get your apples sliced. Then, AND ONLY THEN, can you melt your caramel.

    toppings

    Why? Because once that caramel is melted, you’re on a bit of a clock. The cooler that caramel gets, the harder it is to work with. If you’ve cooked your caramel first without getting the rest of your ingredients prepped and ready, you’re going to go into panic mode real quick. I may be speaking from experience…. 

    THE GOOD NEWS! If the caramel starts to harden, you can always microwave it for a few seconds, so don’t stress out too much.

    Easiest Caramel....Ever?
    Step 2

    Kraft Caramel Bits
    JPEG image 126
    JPEG image 127

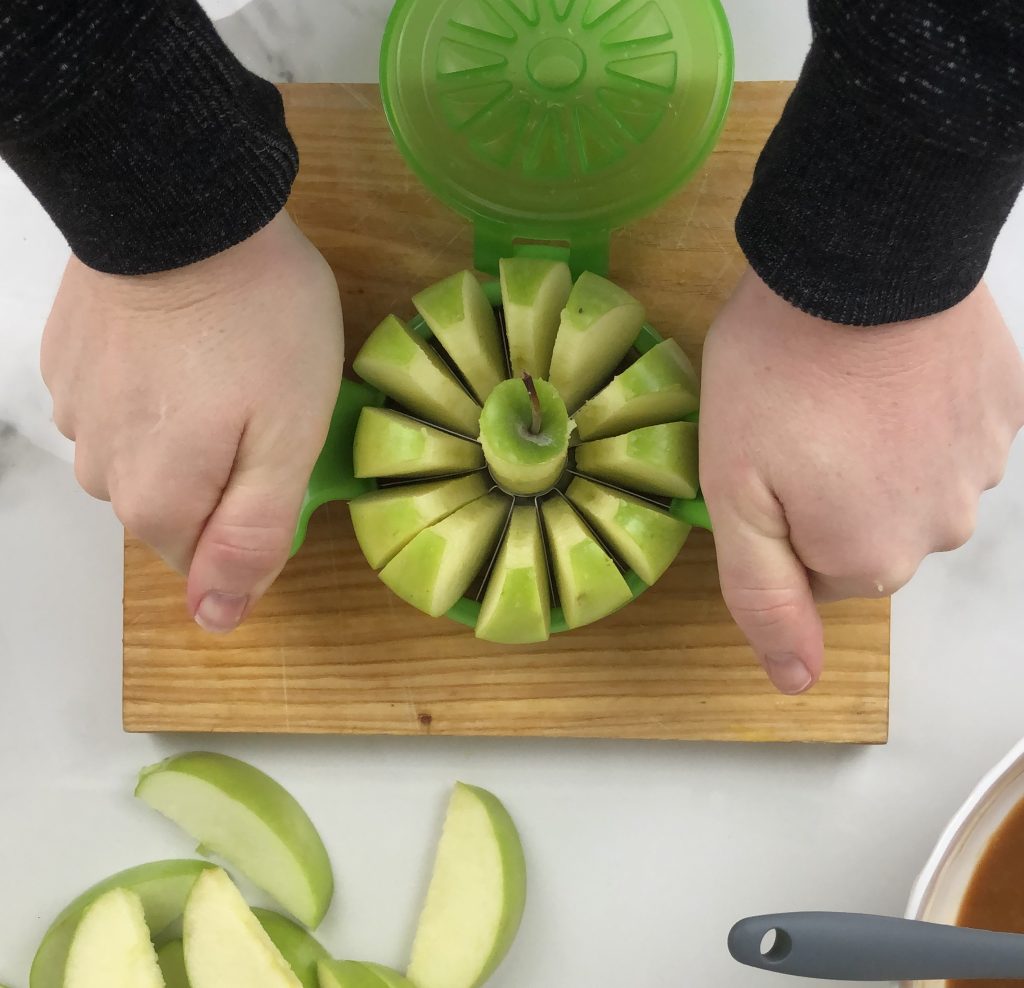
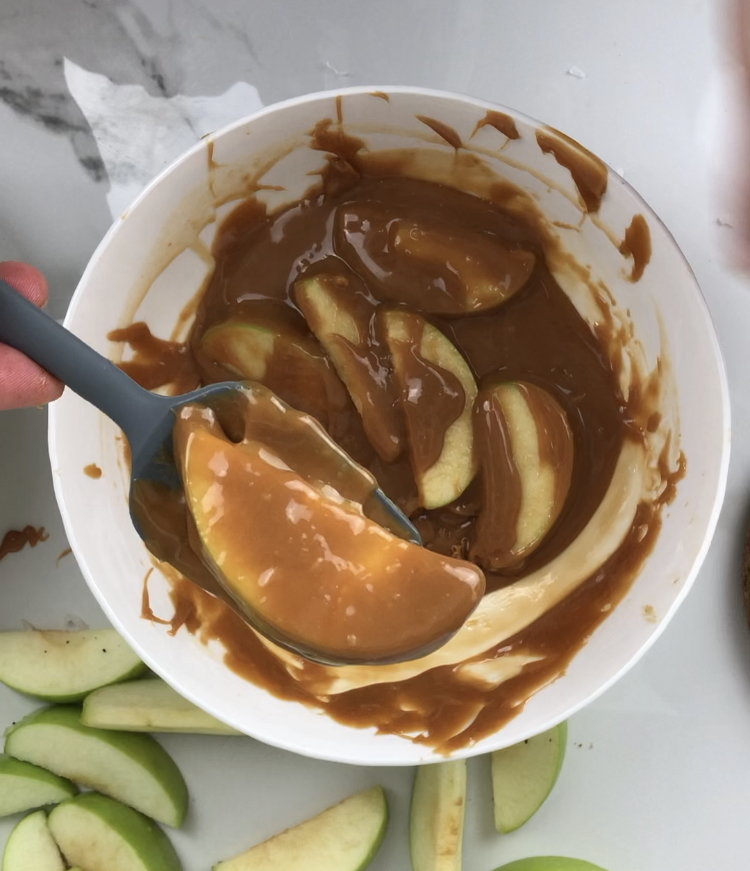
    Caramel really doesn’t get easier than this. I’m not sponsored by Kraft, and I don’t exclusively shop their products, but this one is crazy easy to use and it’s also quite tasty. All you do is add water, microwave for 2 minutes, and stir. Done! It makes making these caramel apple wedges a breeze!

    The other great thing about these bites is you don’t have to individually unwrap each caramel. Brilliant! You just shaved 7 minutes off your labor of love. Yes please! You can find this easily at most grocery stores, but for you online shoppers, here’s a link.

    JPEG image 128
    melted caramel

    Apples... meet caramel
    Step 3

    Now that your toppings are ready, your cookie sheet is out, your apples are cut and your caramel is melted….it’s time to send those apples in for a dunk! 

    A few notes on this:

    A – Cut apples are wet, making it hard for the caramel to stick to the apple. The warmer the caramel is, the better it sticks.  Feel free to microwave the caramel for 30 seconds or so whenever you find the caramel hardening.

    B – If you’re really struggling to get the caramel to stick, try dabbing the apples with a dry paper towel to remove some of the moisture.

    C – Remove excess caramel by scooping the apple slice up with a fork and shaking it a bit. This allows the caramel to drip off the apple without getting your fingers messy.

    D – Once you’re done dunking and dripping, then put your apple slice immediately into the prepared toppings. 

    Time For Toppings!
    Step 4

    This is my favorite part to these caramel apple wedges! So far this process has been somewhat goopy with the caramel, but the toppings are like the light at the end of the tunnel. They make it all come together in such a beautiful and delicious way! 

    Toppings give this that “professional” finish that makes me feel very accomplished…I’m not hard to please apparently.

    IMG_E2011EC9016D-1
    Caramel Apple Coconut
    IMG_A7FD621EE73A-1
    IMG_F083CE720063-1

    The things you need to know about this part:

    1 – Making sure there are abundant toppings under the caramel apple when it’s placed into the bowl.

    2 – Press the toppings to the apple to help them stick. 

    That’s it! After the apples have been coated, then place them on your cookie sheet. Using parchment paper helps the apples not to stick. Although, you’re using so much toppings, this probably won’t be a problem. 

    Caramel Apple Wedges

    PRO TIP: If the caramel apple wedges aren’t going to be consumed for 2.5 hours or longer, you may want to put your apples on cooling racks.

    Since these caramel apple wedges are sliced, they tend to weep if left too long in the fridge. Setting them on the racks will help the excess liquid drip off without the bottoms becoming soggy.

    Melting Chocolate
    Step 5

    Melting chocolate can be a fussy affair. Very serious chocolate lovers get their double broilers and candy thermometers out. Those people most likely are chocolatiers or professional chefs….That’s not going to be us today. 

    Here’s a super simple way to get decently melted chocolate that’s good enough for our purposes today.

    White Chocolate Chips
    olive oil

    When microwaving chocolate, the biggest blunder you can make is over cooking and/or burning it. To avoid this, only microwave your chocolate in short stints. I always start with 30 seconds, then check it with a spoon to see how soft it is. After that I’ll microwave it for 10-20 second stints until it’s soft enough to stir.

    melted white chocolate

    After 30 Seconds in the Microwave

    melted white chocolate

    After 60 seconds in the Microwave.

    Another microwaving chocolate blunder is the type of bowl you’re using. Once I used a ceramic mug, but the mug got hot way too fast. This caused the chocolate to burn. If you keep burning your chocolate, try using a glass or plastic microwaveable bowl.

    caramel apple wedges

    The last big blunder you can make with chocolate is water. Make sure that whatever bowl you’re using is dry. Water can kill your chocolate and make it unusable.

    Drizzle on the chocolate with a spoon, or, if you really want to get fancy, you can pipe it on. A great DIY piping bag can be made from a sandwich ziplock bag. Just cut a small whole in the bottom corner, put the chocolate in, twist the top closed and squeeze it out!

    Refrigeration and Serving
    Step 6

    Once the chocolate has been drizzled to your liking, it’s time to let these bad boys set up. The Kraft Caramel Bits package says to set for 1 hour in the fridge. This is ok, but since the apples are sliced and have a bit more moisture than a regular caramel apple, I like to refrigerate for at least 1.5-2 hours. Leave the caramel apple wedges in your fridge until you’re ready to serve them. Enjoy!

    caramel apple wedges

    Leave a Reply

    Close Menu