No Knead Artisan Bread Bowls

No Knead Artisan Bread Bowls

No Knead Artisan Bread Bowls

This is a recipe summary text. It can be a small excerpt about what you are going to cook.

  • Prep Time2 hr
  • Cook Time20 min
  • Total Time2 hr 20 min
  • Serving Size6 Bowls

    Ingredients

    • 650 G OR 4 1/2 Cups All Purpose Or Bread Flour plus more for dusting
    • 1 TBS Yeast
    • 1 TBS Salt
    • 510 G OR 2 1/4 C Warm Water

    Non Food Items

    • Parchment Paper (Optional but highly recommended) If not using parchment paper, use nonstick spray/butter/oil of choice to create a nonstick surface.

    Method

    1

    Add the flour into a bowl. Add the yeast to one side, and the salt to the other side, then mix together with a fork.

    2

    Add the water and mix with a wooden spoon or spatula until all the ingredients are incorporated. Leave the dough in a bowl, cover with a lid or Saran Wrap. Let rise for 1 hour.

    3

    After an hour, on a cookie sheet, add parchment paper OR butter/preferred non stick oil or spray.

    4

    Dust a countertop with flour and pour out the dough. Lightly flour the top of your dough and flatten to let all of the air out. With a knife or bench knife, divide the dough into 6 separate pieces.

    5

    Shape the dough into balls by folding the edges into the center (2nd video in post if you need it). Place the dough balls on the cookie sheet, spreading them out evenly. Sprinkle a bit more flour on the tops of the dough balls, dampen a cloth and cover the dough. Rise for 30 Mins

    6

    After 30 minutes, turn on the oven to 400 degrees F. While the oven is heating up, remove the damp cloth. With a sharp knife or lame/razor, score the tops of the bread to your desired shape. 

    7

    Once the oven is hot, add in the dough and bake for 20 minutes or until the tops turn golden. Note: Directly out of the oven, these bread bowls will seem very hard. This is normal. Let it cool for 20 minutes and they will soften.

    8

    Cut the tops off and scoop out the insides. Keep for dipping! Pour in desired soup and enjoy.

    I love to score my buns in a square shape. This helps create a natural opening in your bread bowl.

    No Knead Artisan Bread Bowls

    No Knead Artisan Bread Bowls! Are you kidding me? We’re taking “No Knead” to a whole new level. With the ease of the no knead method, these No Knead Artisan Bread Bowls are insanely easy to make, and are fairly quick to create. 

    If you’re looking for a good beginner bread recipe, this is a great one to start with because it requires minimal effort and skill.

    No Knead Artisan Bread Bowls

    Step 1 - Mix it up!

    First, take the flour and put it into a large mixing bowl. If you have a mixing bowl that already has a lid, that’s even better! Then, add in the yeast and salt. 

    It’s a good idea to put them on different sides of the bowl and then mix together with a fork. 

    Why? Salt slows yeast. When you put them directly together, it can hinder how your yeast performs. If you mix it with a bit of flour, it dilutes the effect of the salt.

    Add in the water and stir everything together until completely incorporated. 

    Depending on the temperature of your kitchen, you’ll want to add lukewarm, or hot water. If you have a warm kitchen, use lukewarm water. If your kitchen is cold, use hot water. 

    PRO TIP: Some people have a hard time understanding the right temperature to heat their hot water to when using yeast. They’ll use thermometers to get that perfect degree. 

    Here’s an easy way to master this: Heat the water to the same temperature that you would when taking a hot bath. Simple right!? Works every time.

    Step 2 - Rise and Shine

    Next, it’s time to let your dough rest and rise. Cover your bowl with your lid or Saran Wrap. Let it rise on your countertop for 1 hour. 

    covered dough
    risen dough

    Step 3 - Shape it up

    It’s time to shape up those buns! But not those ones…

    On a clean counter, lightly flour the surface. Pour out your dough and sprinkle a bit more flour on the top. 

    You’ll then want to flatten the dough to squish out all of the air. This helps the dough rise evenly after shaping them.

    Using a knife or bench knife (my preferred tool), cut the dough into 6 equal sizes. Next, you’re going to shape the dough by folding the edges into the center. 

    Do your best to create some tension. The tighter the ball the better. 

    But, it is possible to over tighten the dough. You can tell when you’ve gone too far if the top of the dough is breaking from the stretch/tension you’ve created.

    Need a bit more help with the shaping? I made this video just for you!

    Step 4 - Second Rise

    Take a cookie sheet and place the parchment paper on it. This is an easy and surefire way of keeping the dough from sticking. There’s nothing more aggravating then cooking some amazing bread bowls, just to see they are stuck to the pan. 

    If you don’t have parchment paper, nonstick spray or brushing oil/butter on the cookie sheet should do the trick as well.

    Add the dough evenly to the cookie sheet and sprinkle a bit more flour on the top of the buns. 

    Take a damp clean cloth and cover the dough. I like to use a lighter linen cloth so as not to inhibit the dough from rising. 

    Let the dough rise for another 30 minutes.

    Step 5 - Kevin…Bake on!

    After your 30 minutes are up, turn on your oven to 400 degrees F. 

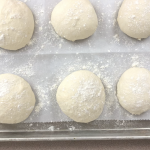
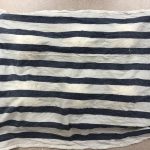
    While your oven is heating, take off the damp cloth. It’s time to score those buns! 

    Traditionally to do this, people use a lame. If you don’t have one, a good substitute is simply a clean razor or a sharp knife. If you’d like to get one, here’s the one I use, it comes with a handle that sometimes I use, and 5 blades.

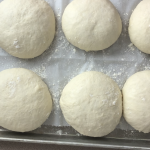
    When scoring the buns, be careful not to deflate them by using too much pressure. 

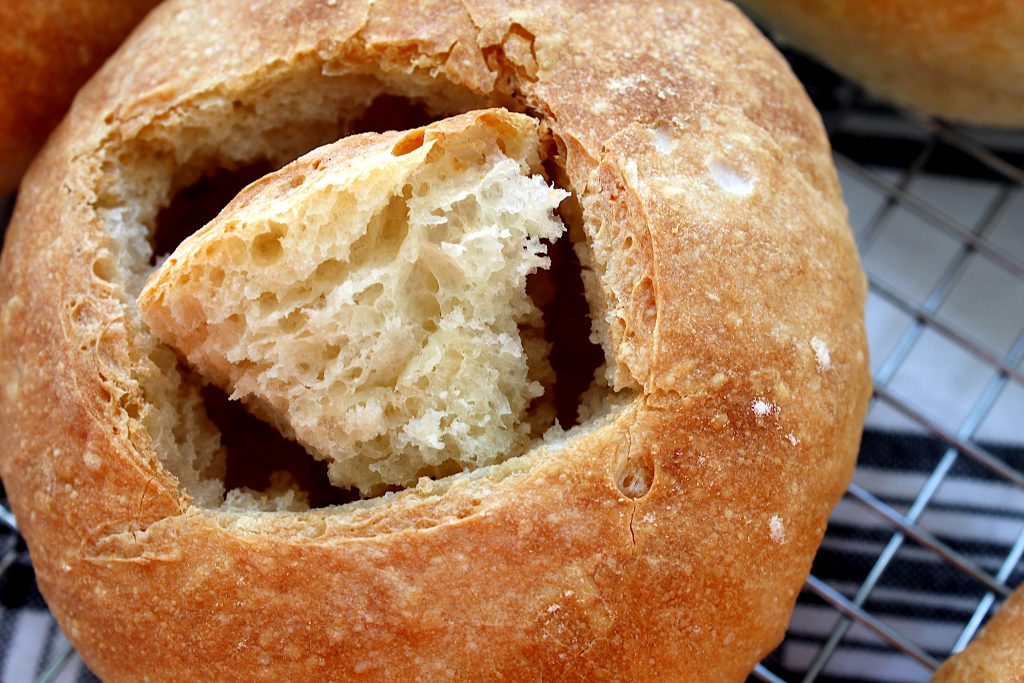
    I like to score the buns in a square shape. This helps create an easy opening for when it’s time to cut them open.

    Once the oven has reached 400 degrees, toss in those buns and cook them for 20 minutes. 

    You’ll know they are done when the tops are a rich golden brown and when tapped, they sound hollow. 

    NOTE: When these first come out of the oven, they feel hard as rocks. Let the bowls cool for 20 minutes and they will soften.

    No Knead Artisan Bread Bowls

    Now that the bowls have cooled it’s time to cut out the tops for an opening and hollow them out. 

    Using a sharp knife, cut out the top in your desired shape. Then, using your finger, pull the filling out and set aside. 

    You’ll want to hold onto the innards to dip in your soup later. When you’re ready to eat, pour soup into the bowls. 

    Enjoy your fancy schmancy No Knead Artisan Bread Bowls!

    No Knead Artisan Bread Bowls

    Try With These!

    Leave a Reply

    Close Menu